


Installation Guide
Before Installing
Preparing a Partition for Haiku
Currently, Haiku cannot resize existing partitions; therefore, you either need to already have an empty partition where you can install Haiku, or you need to create one using a third party tool. If your current OS comes with a partitioning tool, try to use that. Otherwise, you can use specialized tools like the freely available GParted LiveCD. A standard 32-bit install of Haiku requires about 1.3 GiB of disk space (64-bit install is about double), so the partition doesn't need to be huge. However, you may want to leave some room for stuff, so 3 GiB+ is the recommended partition size.
Whenever your disk has multiple partitions, you will also need a boot loader such as GRUB to be able to boot into Haiku (and any other systems that you may have installed in the remaining partitions). In some cases, it is also possible to use the Haiku Boot Manager.
Let's Start the Installation!
Insert the Haiku Installer CD into your CD-ROM drive and power up your system.
1 After a few seconds, you should see the Haiku boot splash screen.
If any of the screens below fail to appear, try the fail safe mode options which can be enabled by holding SHIFT before the CD starts to load. See Boot Loader for details. Please also consider reporting the issue at the bug tracker.
2 This panel (depending on your hardware it can take a while to appear) lets you set the system language and keymap.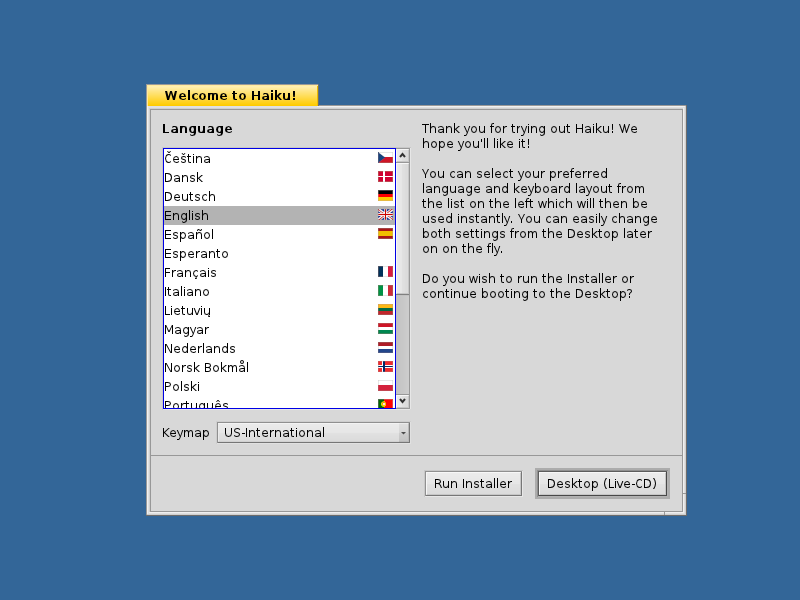
Then you decide to either install Haiku on a partition by clicking or try out Haiku by booting to the desktop directly from CD by choosing . Run the Installer.
3 Before the Haiku Installer starts, a notice is displayed. It contains information regarding prior partition setup (as described above) and GRUB setup (as described further down in this guide). Click on to proceed to the Installer.
4 If the following alert pops up, it just means that no partitions with the Be File System (BFS) have been found. Acknowledge with .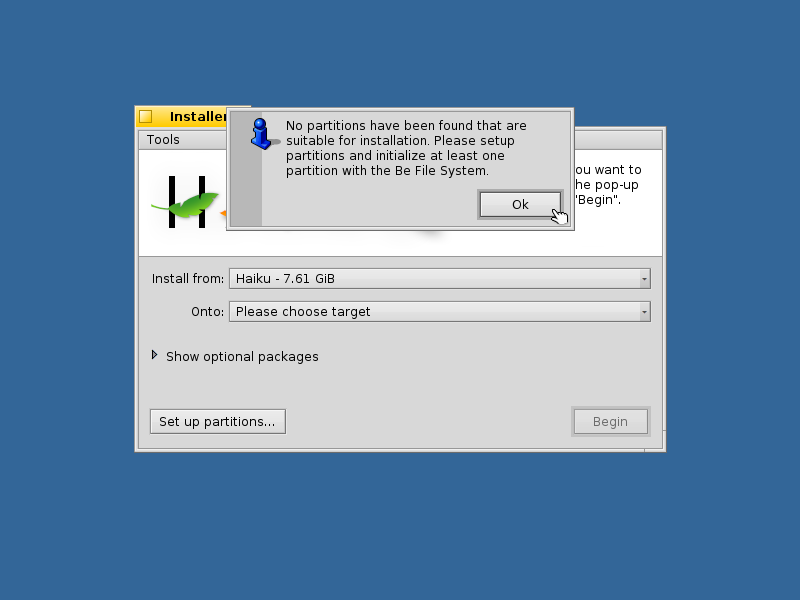
5 When there is no BFS partition available, or if you want to use a differently formatted partition, you use the DriveSetup partitioning application. Click on to start DriveSetup.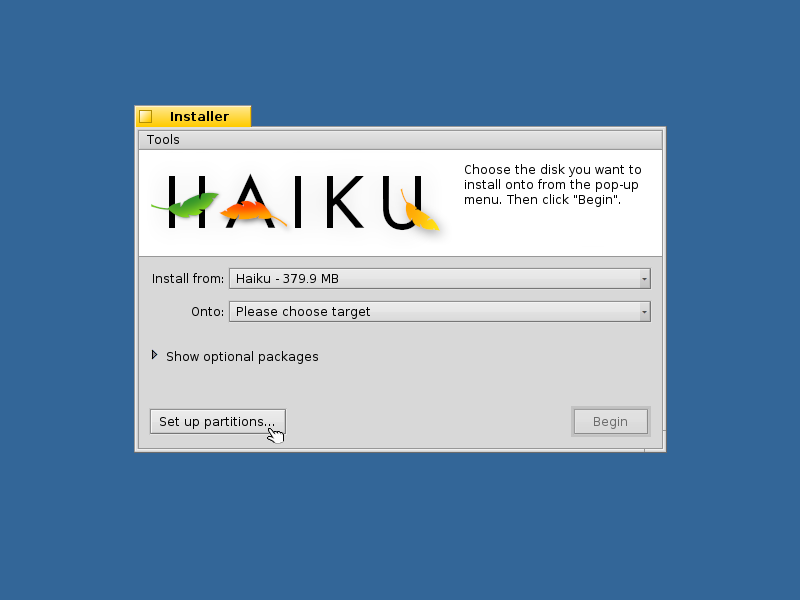
6 Haiku's partition manager DriveSetup shows the disks and partitions that have been identified.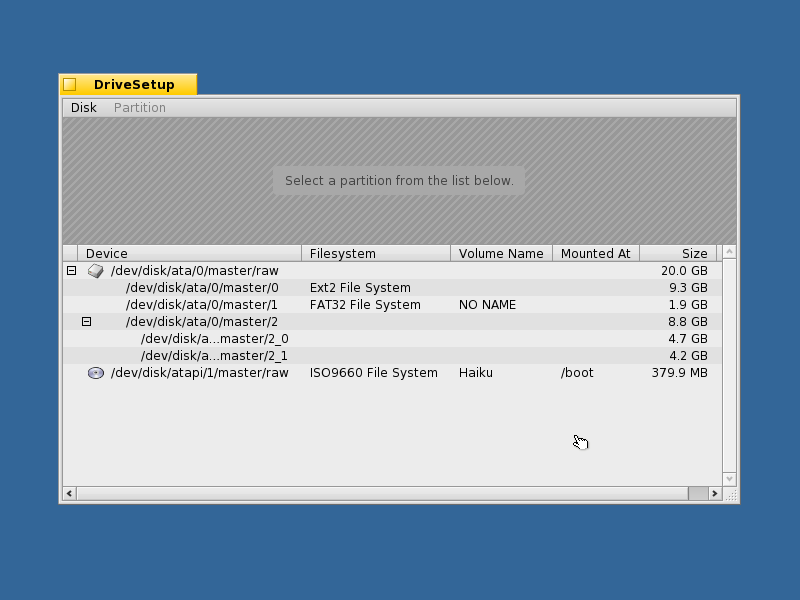
7 In this example, there already are two primary partitions. One of about 9 GiB using an Ext2 File System, and another one of 2 GiB with a FAT32 File System. There are also two extended partitions that are still empty. These partitions have been previously prepared using a partitioning tool.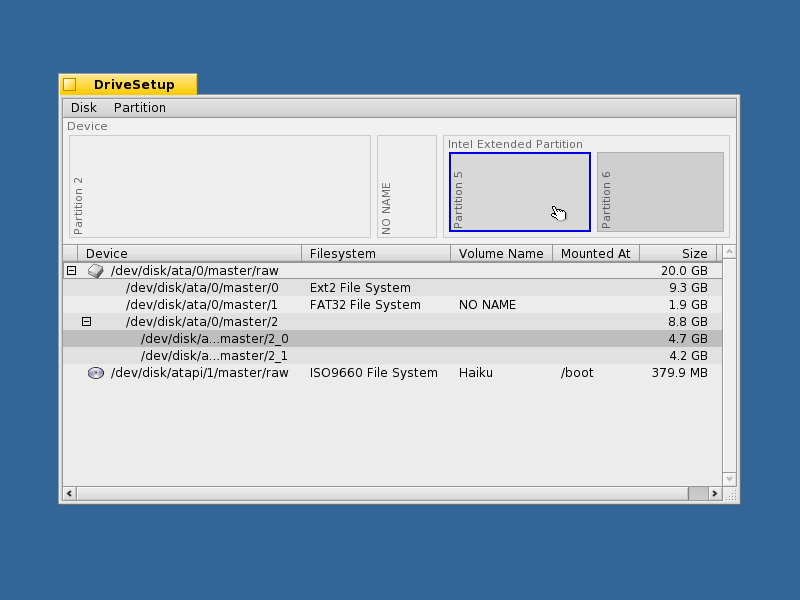
Now selecting the partition you want to install Haiku on. As soon as you click on a disk, its partition layout will be graphically represented. You can then also choose the partition by clicking on it in the layout graphic. The currently selected partition is marked by a blue border in the layout graphic.
8 To initialize a partition to the Be File System, make sure the right partition is selected, then use the menu .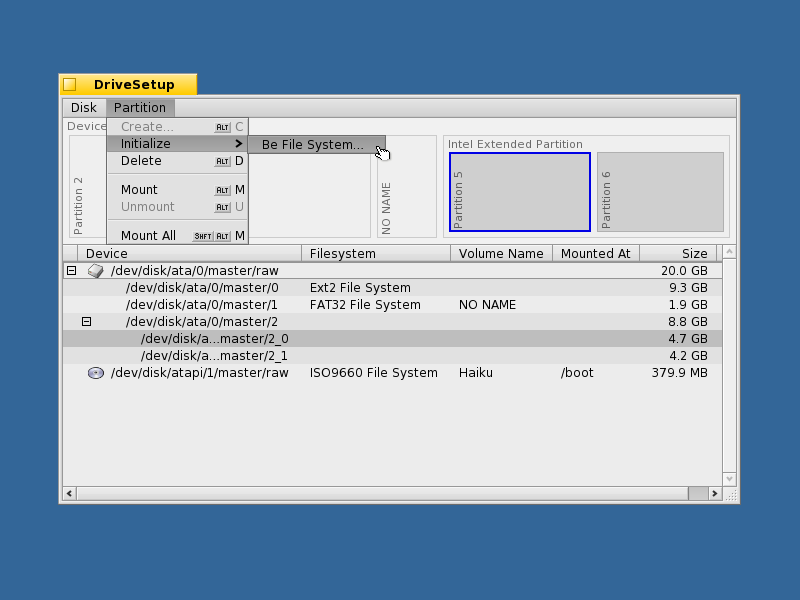
9 An alert will pop up to ask if the initialization should be started. If you are still sure you have the right partition selected, click , otherwise the initialization.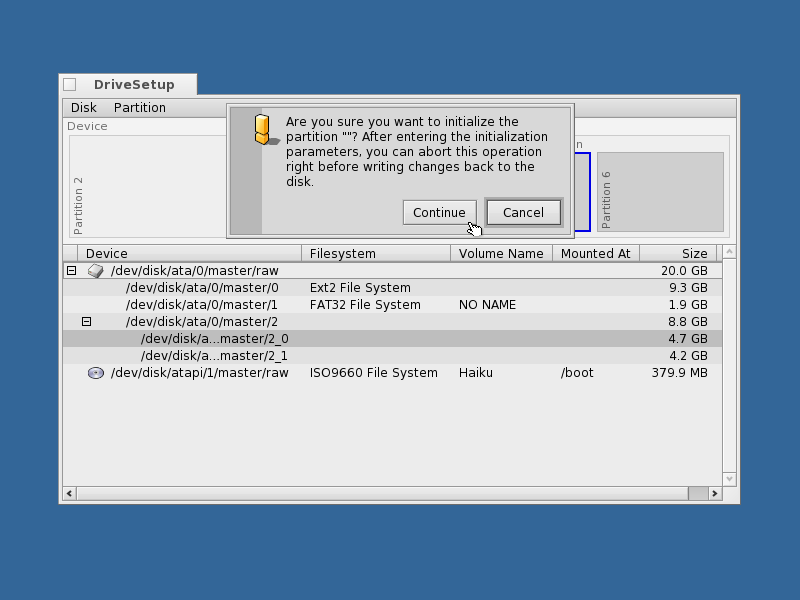
As the alert says, you can still abort initialization before writing any changes to disk later.
10 Now you enter the name for the new partition, or simply leave the suggested "Haiku". You can also select another blocksize; the default of 2048 should be fine for most uses, though.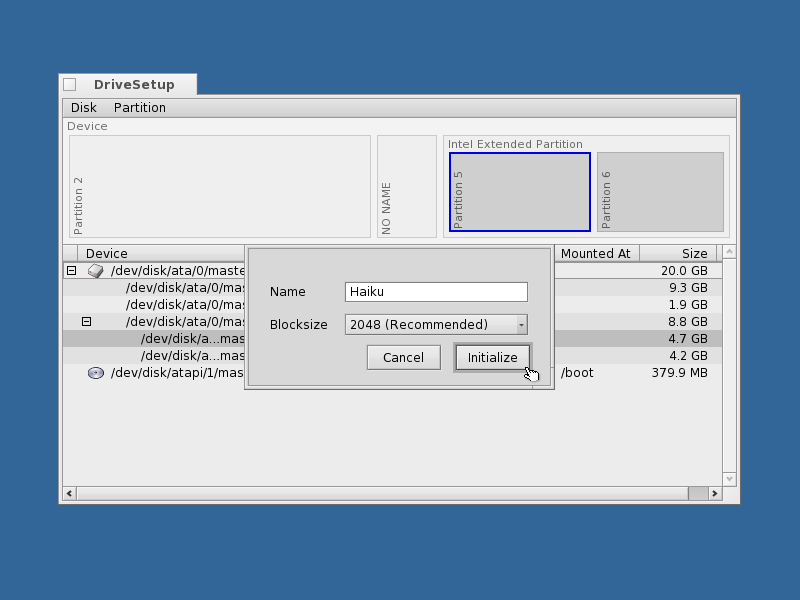
Click to continue.
This is the last step before the initialization is executed! All data on the selected partition will be irrecoverably lost!
11 If everything still looks fine, click , otherwise abort with the button.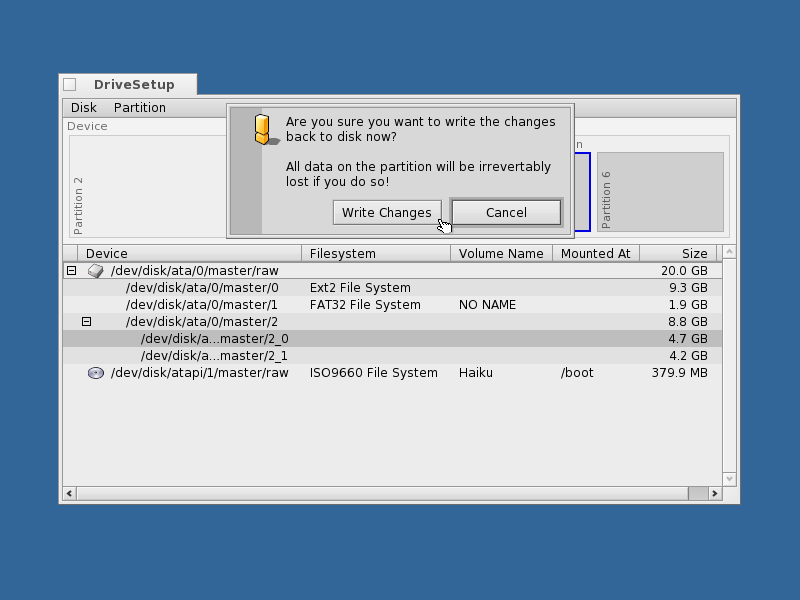
12 The partition has been initialized with the Be File System. Click to close this notification.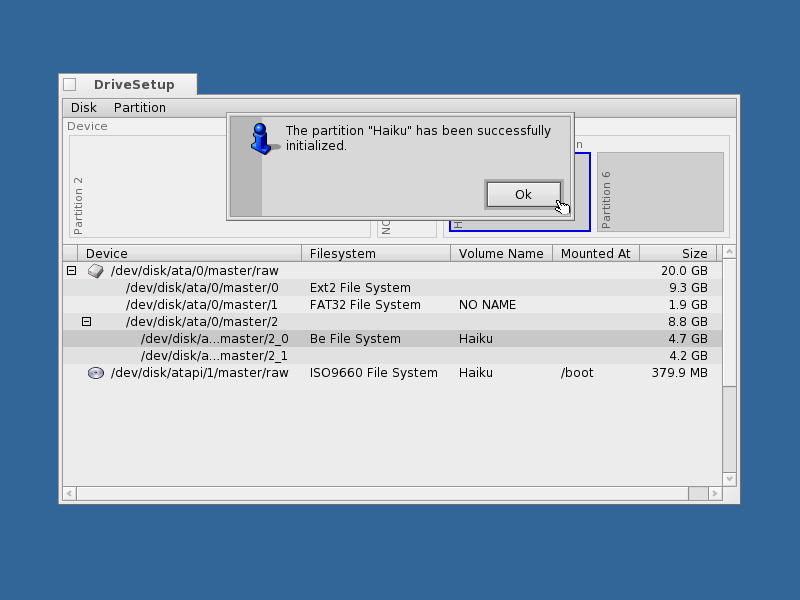
13 You can now see the file system type and name has been updated in the list. Also, the graphical representation should now bear the correct name. The partition setup is now complete.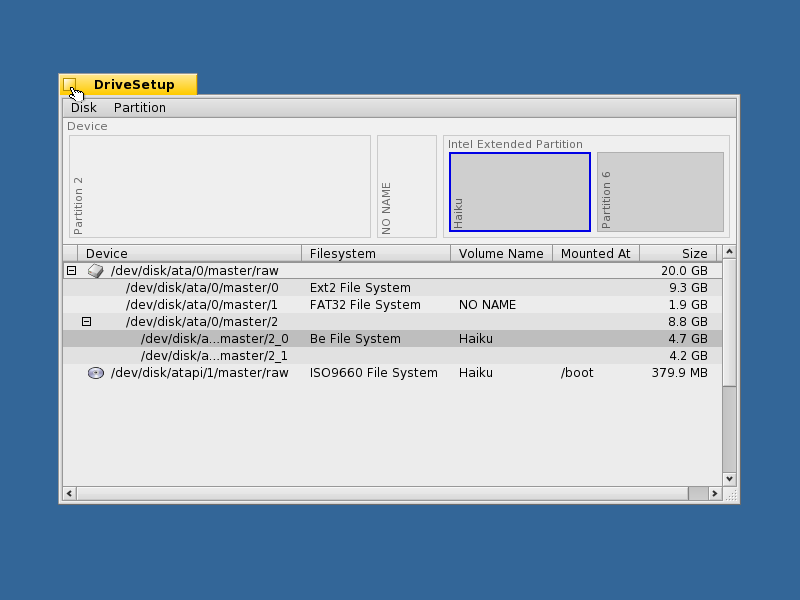
Close DriveSetup by clicking on close widget on the left upper corner of the yellow window tab.
14 The Installer window re-appears and should now show an updated list of target partitions under . Now choose your freshly initialized partition (or a pre-existing one if you already had one) as the installation target.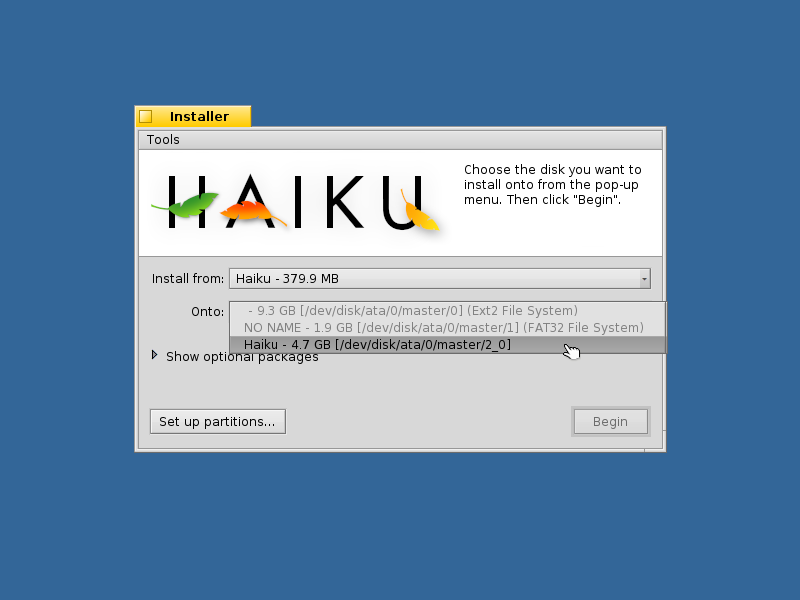
15 The volume with the name Haiku has been chosen as the target for installation. Click on to start the installation.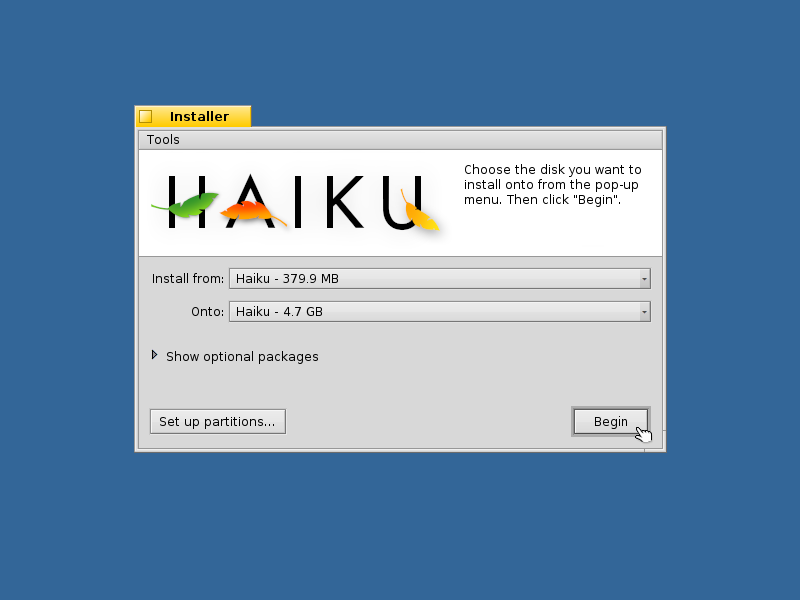
16 The installation process collects some information before starting to copy data. This can take a few seconds.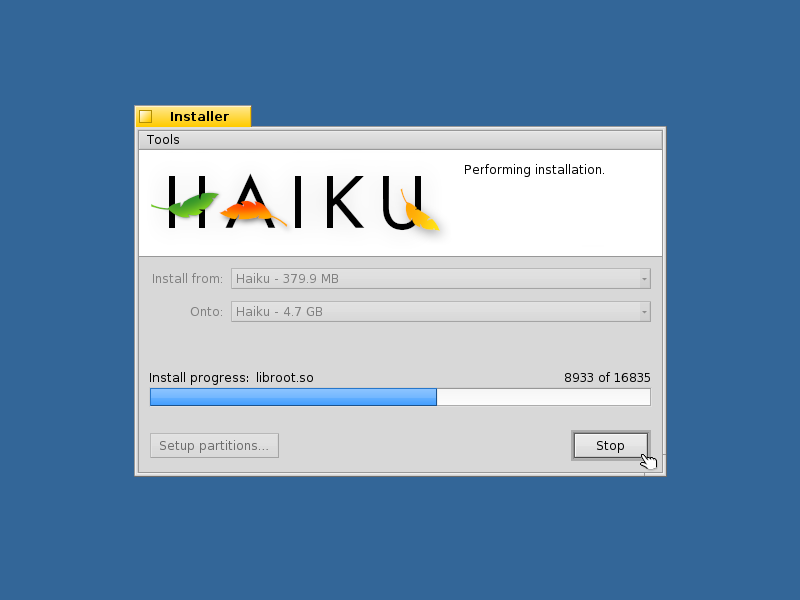
Soon after, packages start to be copied and a progress bar with a file count is displayed. While the copying is taking place, it is always possible to quit the process by clicking on the button.
17 When the copying process is finished, you can quit the installer by clicking on . The install CD will be ejected, and the system will restart after a few seconds. Do not forget to remove the Haiku CD from your drive.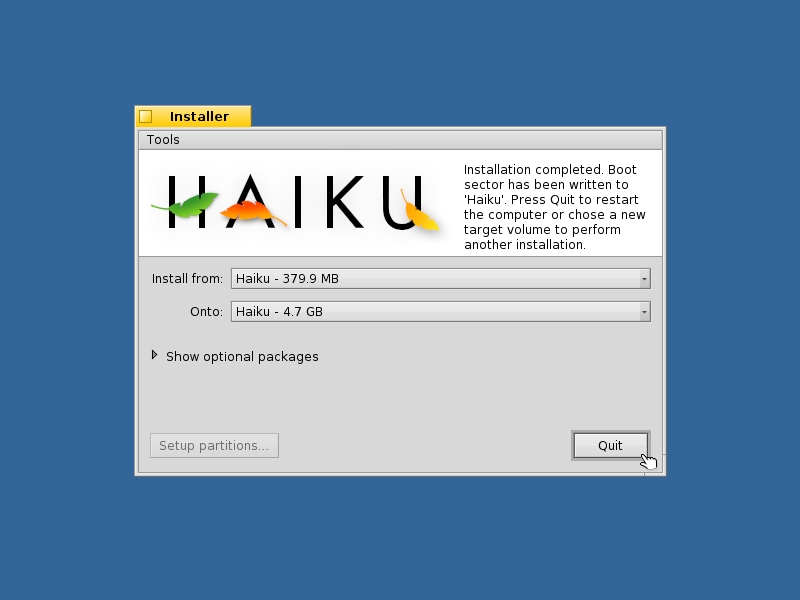
Note that the Installer will take no steps to integrate Haiku into an existing boot manager menu. The Haiku partition itself will be made bootable, though. From the Tools menu you can launch the Boot Manager that puts a menu in the boot sector to choose what operating system to boot.
Boot Manager isn't yet tested very well and still has a few restrictions that it will complain about if they aren't met: the menu can only be installed on your first harddisk and there has to be a 2KiB space after the Master Boot Record (MBR).
You don't need to run Boot Manager if you already use a bootmanager like Grub, in which case you have to add Haiku manually, or Haiku runs exclusively on your machine. The Boot Manager panel will guide you through installing or uninstalling the boot menu.
Please see below for how you can add Haiku to an existing GRUB installation or how to use the CD to boot into a Haiku installation without adding it to the boot manager.
Adding Haiku to GRUB
If you have GRUB already installed, you can add Haiku to its boot menu. Depending on what version of GRUB you use, this is done differently.
GRUB 1
Configure your /boot/grub/menu.lst by launching your favorite editor from a Terminal like this:
sudo <your favorite text editor> /boot/grub/menu.lst
You'll note that GRUB uses a different naming strategy for hard drives than Linux. With GRUB it's: (hdN,n)
- All hard disks start with "hd".
- N is the hard disk number, starting with "0".
- n is the partition number, also starting with "0".
The first logical partition always has the number "4", regardless of the number of primary partitions.
	# Haiku on /dev/sda7
	title		Haiku
	rootnoverify	(hd0,6)
	chainloader	+1
You can see the correct partition in GParted for example.
GRUB 2
Newer versions of GRUB use an extra configuration file to add custom entries to the boot menu. To add them to the top, you have to create/edit a file by launching your favorite editor from a Terminal like this:
sudo <your favorite text editor> /etc/grub.d/40_custom
NOTE: While the naming strategy for hard disks is still as described under GRUB 1, the naming scheme for partitions has changed. GRUB's naming scheme is still: (hdN,n)
- All hard disks start with "hd".
- N is the hard disk number, starting with "0".
- n is the partition number, which for GRUB 2 starts with "1"
With GRUB 2 the first logical partition always has the number "5", regardless of the number of primary partitions.
	# Haiku on /dev/sda7
	menuentry "Haiku" {
		set root=(hd0,7)
		chainloader +1
	}
You can see the correct partition in GParted for example.
Additionally you have to edit another file to actually display the boot menu:
sudo <your favorite text editor> /etc/default/grub
Here you have to comment out the line "GRUB_HIDDEN_TIMEOUT=0" by putting a "#" in front of it in order to actually display the boot menu.
Finally, you have to update the boot menu by entering:
sudo update-grub
Not using GRUB
If you use an other boot manager than GRUB, please consult its documentation on how to add a new operating system.
Boot using the CD
You can also use the boot CD to boot into your Haiku installation without adding it to a boot manager. To do so, hold SHIFT before the CD begins to load. This will bring up the Boot Loader Options.
1 To choose the installation to boot from, press ENTER to navigate to the boot volume selection. Your installation should be listed there.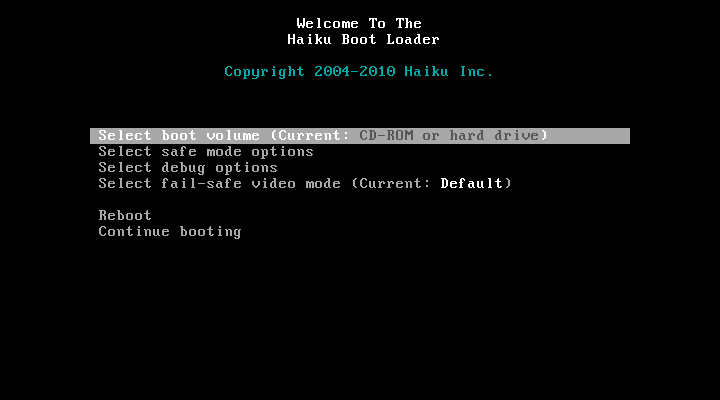
2 Select the volume using the ↑ / ↓ keys and press ENTER again to choose it as the boot volume and return to the main boot loader menu.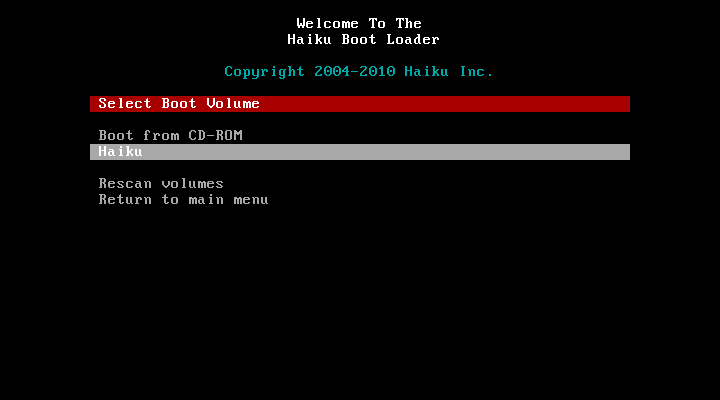
3 The selection will automatically jump to . Press ENTER again to start booting into your Haiku installation.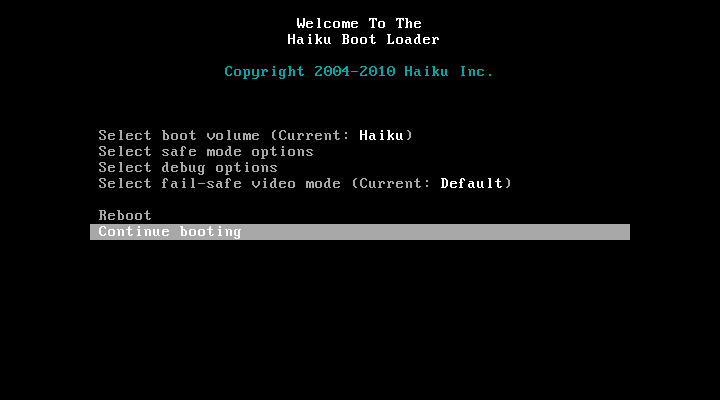
First Boot
Once fully booted, you should be greeted by a screen like this:
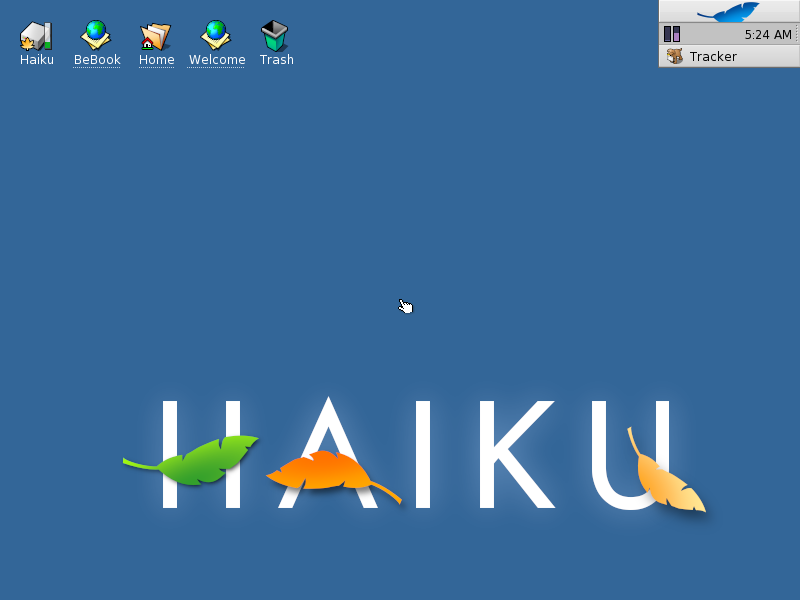
Some background processing will still take place the first time you boot Haiku, so don't be alarmed by the disk activity. After a little while, the system should settle down. Make sure to read our Welcome documentation; there is a link on the Desktop.
Have fun and thanks a lot for trying out Haiku! We hope you'll like it! If you run into what you believe to be a bug, please file a report in our bug tracker. Before filing a bug report, please take the time to quickly check if your issue has already been reported; it if has, then please add a comment if you have additional information, like how to reproduce the problem. If the issue hasn't been reported before, create a new ticket and provide as many useful details as you can.